Over time, even the best timber furniture can lose its luster due to scratches, stains, or general wear and tear. But don’t toss it out just yet—timber furniture restoration is a satisfying and budget-friendly DIY project that can revive old, damaged, or faded pieces and make them look brand new again. With a few tools, some patience, and the right techniques, you can bring out the natural beauty of your wood furniture. Here’s a complete guide filled with DIY tips and tricks to help you restore your timber furniture successfully.
Step 1: Assess the Condition of the Furniture
Before you begin, evaluate the piece carefully:
-
Is it solid timber or veneer? Veneer needs extra care during sanding.
-
Check for damage: Look for cracks, loose joints, stains, deep scratches, or water damage.
-
Decide on your goal: Do you want to restore its original look, give it a new finish, or repaint it entirely?
Step 2: Clean the Surface Thoroughly
Start by cleaning the furniture to remove dust, oils, and old grime.
Materials:
-
Mild dish soap or vinegar
-
Warm water
-
Soft cloth or sponge
Wipe down all surfaces, including hidden corners. For sticky residues or old wax, use a wood-safe degreaser or mineral spirits. Let it dry completely before moving on.
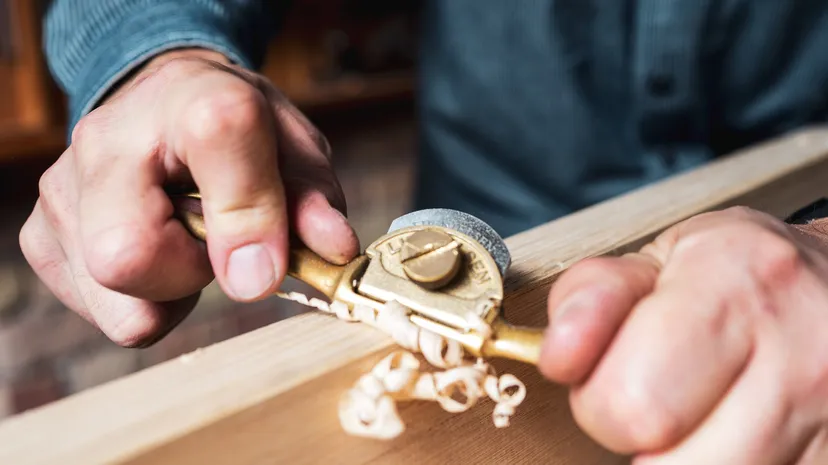
Step 3: Sanding the Wood
Sanding is key to removing old finishes, scratches, and surface stains.
Tools:
-
Sandpaper (start with 80-100 grit, then move to 150-220 grit)
-
Sanding block or electric sander
Tips:
-
Always sand in the direction of the wood grain.
-
Don’t over-sand edges or corners to avoid flattening the shape.
-
Use finer sandpaper (220 grit) for a smooth final finish.
If the piece has decorative carvings, use sanding sponges or detail sanders.
Repair Any Damage
Now is the time to fix structural or cosmetic issues.
Common repairs:
-
Loose joints: Re-glue with wood glue and clamp until dry.
-
Small holes/cracks: Fill with wood filler, let dry, then sand flush.
-
Deep gouges: Use wood putty that matches the grain or stain the filler afterward to match the surrounding wood.
Allow all repairs to cure completely before applying any finish.
Step 5: Choose Your Finish
The final step is choosing how you want the wood to look. There are several finishing options:
1. Stain + Sealer
Perfect for enhancing the natural wood grain.
-
Apply wood stain with a cloth or brush.
-
Let it penetrate for 5–15 minutes, then wipe off excess.
-
After drying, apply a protective clear coat (polyurethane, varnish, or lacquer).
2. Oil Finish (e.g., Danish Oil, Tung Oil)
Great for a more natural, matte look.
-
Easy to apply and maintain.
-
Brings out rich tones in timber.
-
Apply multiple coats with light sanding between.
3. Paint
Ideal for a dramatic transformation.
-
Use a wood primer first.
-
Apply 2–3 coats of quality paint, sanding lightly between layers.
-
Seal with a topcoat for durability.
Step 6: Final Touches
-
Reattach any hardware or replace it for a modern look.
-
Use felt pads under legs to protect floors.
-
Buff with a soft cloth once fully dry to enhance the shine.
Bonus Tips for Timber Restoration
-
Test stains and finishes on an inconspicuous area first.
-
Work in a well-ventilated area or outdoors if possible.
-
Be patient—rushing the process can result in blotches or uneven surfaces.
-
For antiques or valuable pieces, consider consulting a professional.
Conclusion
Restoring timber furniture is a rewarding way to breathe new life into old pieces, save money, and create something truly unique. Whether you’re revamping a flea market find or bringing a family heirloom back to glory, these DIY restoration tips will help you achieve beautiful, lasting results.